How to Use Planable for Social Media Management and Collaboration
Managing social media across multiple platforms and teams can be chaotic. Planable is a centralized content management tool that simplifies scheduling, collaboration, and approvals, ensuring everything runs smoothly.
This guide will walk you through why we use Planable, how to set it up, and its key features to help you streamline content workflows and improve efficiency.
1. Why We Chose Planable
Social media management requires multiple moving parts—content creation, approvals, scheduling, and performance tracking. Instead of managing this through scattered emails and spreadsheets, Planable provides a structured workflow that enhances efficiency.
Key Benefits
✅ Streamlined Collaboration – Keep all content, feedback, and approvals in one place, reducing scattered emails and miscommunication.

✅ Faster Approvals – Eliminate back-and-forth emails with a simple, one-click approval process for faster content publishing.


✅ Live Post Previews – See exactly how posts will appear across different platforms before publishing to ensure formatting and branding consistency.
✅ Built-in Analytics – Track engagement, performance, and trends directly within Planable to optimize your content strategy.

With these features, Planable makes content collaboration seamless and scalable for teams of any size.
2. Getting Started with Planable
Your Planable workspace is the hub where you organize social media pages, posts, and team roles.

How to Set Up Your Workspace
Log into Planable at app.planable.io.
Click "Create Workspace" and name it after your business or project.
Connect social media pages (Facebook, Instagram, LinkedIn, TikTok).
Invite team members and assign roles:
Admins – Manage all content and approvals.
Editors – Create and edit content but need approval.
Approvers – Clients or managers who review and approve posts.
Customize workflow settings for approval permissions and posting rules.
This setup ensures organized, structured content management, reducing bottlenecks.
3. Viewing and Managing Content in Planable
Planable offers multiple viewing modes to help teams organize, schedule, and visualize content with ease. Whether you’re reviewing posts, adjusting schedules, or ensuring brand consistency, these views provide the structure you need for seamless content planning.
3.1. Feed View
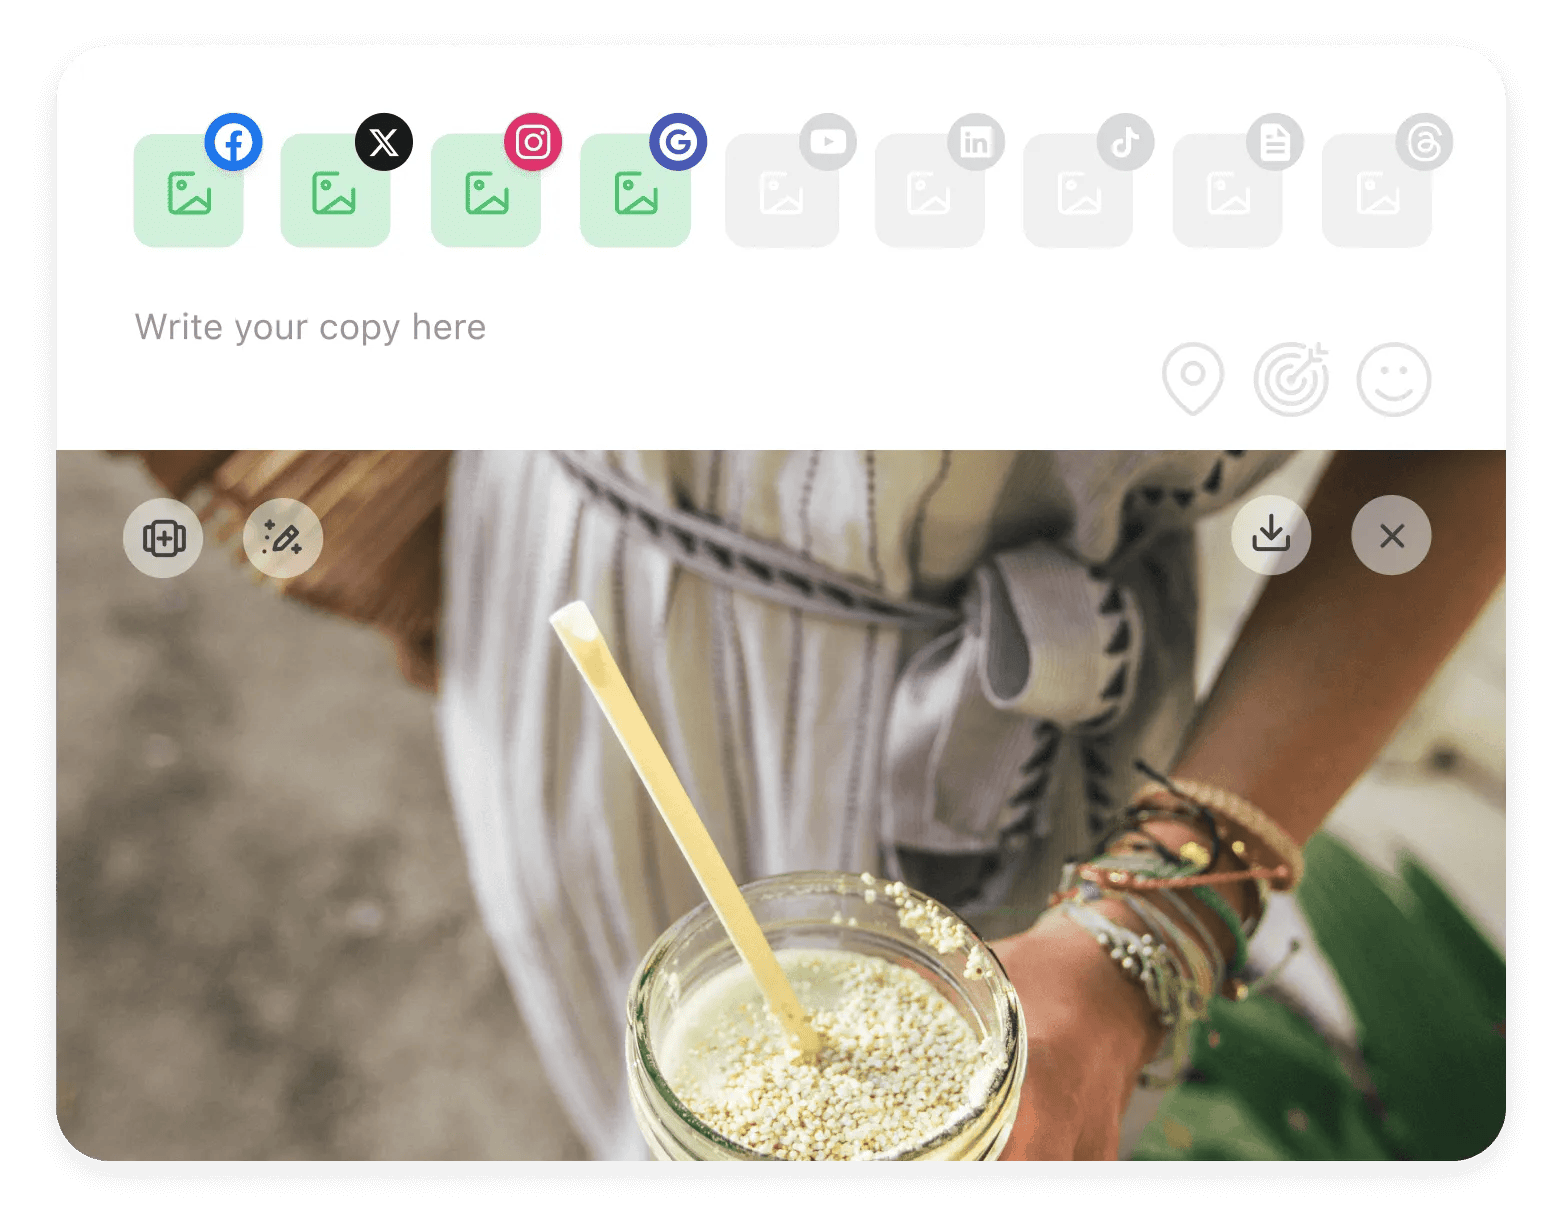
The Feed View provides a real-time preview of how posts will appear on each social media platform. Instead of guessing how content will look after publishing, teams can scroll through upcoming posts in an intuitive, social media-style feed. This makes approvals and edits easier, as feedback can be left directly on posts, and changes can be implemented instantly. With a single click, posts can be approved, disapproved, or sent for revisions, keeping workflows smooth and efficient.
3.2. Calendar View
For those managing content across multiple platforms, the Calendar View offers a clear, structured look at all scheduled posts.

Content can be viewed in a weekly or monthly format, making it easy to identify posting gaps or overlaps. Moving posts is as simple as dragging and dropping them into new time slots, allowing for quick rescheduling.

Need to focus on a specific platform? The filtering option helps teams view only the content relevant to a particular channel.

3.3. Grid View (For Instagram Planning)
Planable’s Grid View is designed to help you plan and preview your Instagram feed before posts go live. This feature allows you to see how your content will look on your profile, ensuring a visually cohesive and well-organized feed.
If you want to adjust how posts are displayed, you can use the “Sort by” feature and select “Last Scheduled” to arrange them in chronological order. This helps keep track of upcoming posts and ensures a smooth content flow.
The drag-and-drop functionality makes it easy to rearrange posts within the grid, allowing you to perfect your Instagram layout before publishing. By visually planning your feed in advance, you can ensure your branding, colors, and themes remain consistent across all posts.

One important note: while the drag-and-drop feature lets you adjust the post order for planning purposes, it does not automatically change the scheduled date and time. The changes will be reflected for everyone accessing the content in Planable, but the publishing schedule remains the same unless manually updated.

With Grid View, you can effortlessly organize your Instagram content, refine your brand’s visual identity, and maintain a polished, professional-looking feed.
3.4. List View
Planable’s List View is designed for efficiency, giving you a structured overview of all your scheduled and drafted posts in one place. This view is especially useful for teams managing multiple accounts, as it allows for quick organization, bulk actions, and easy content approvals.
In List View, posts are displayed with key details such as platform, status, author, labels, and scheduled date and time. This format makes it easy to scan and track content progress at a glance, helping you stay on top of your posting schedule.

If you need to take action on multiple posts at once, bulk actions allow you to approve, edit, or delete several posts simultaneously. This feature is a time-saver for teams working with high volumes of content, streamlining the approval process without the need for individual edits.
Additionally, List View provides a clear status indicator for each post, showing whether it’s in draft, pending approval, or scheduled for publishing. This helps keep teams aligned and ensures no content falls through the cracks.

With List View, you get a structured and efficient way to manage content across multiple accounts, quickly track content status, and streamline approval workflows—all in one convenient dashboard.
3.5. Analytics View
Planable’s Analytics View gives you a data-driven approach to content performance, allowing you to track key engagement metrics without leaving the platform. Instead of switching between social media dashboards, you can monitor post performance directly within Planable to refine your strategy based on real-time insights.
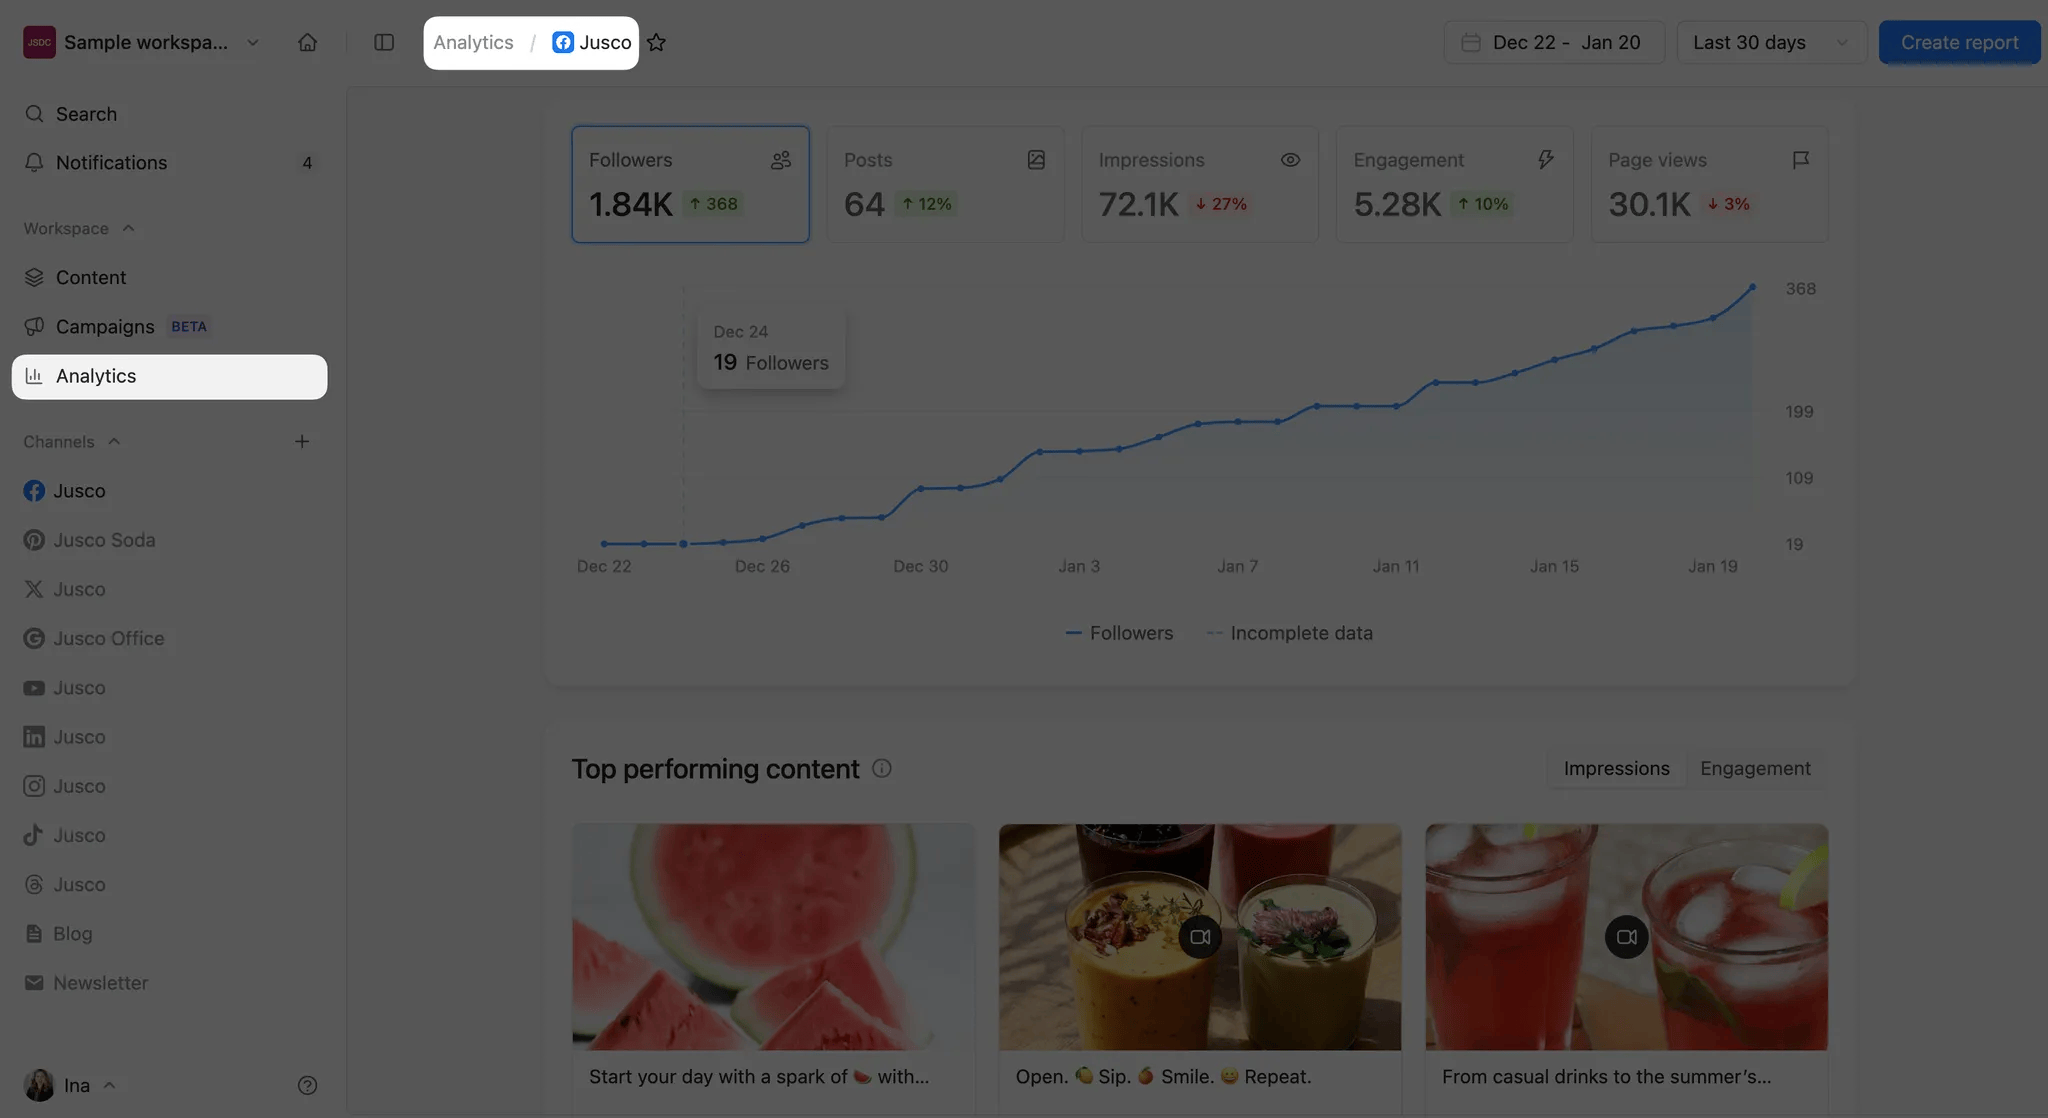
Analytics View is currently available for Facebook, Instagram, LinkedIn, and TikTok, with additional platforms expected in the future. For each channel, you can access essential performance indicators such as:
Facebook Insights – Track followers, post reach, engagement, impressions, and page views.
Instagram Insights – Monitor follower growth, reach, impressions, profile visits, and engagement.
LinkedIn Insights – View total followers, post impressions, engagement, and page views.
TikTok Insights – Analyze video views, profile visits, engagement levels, and audience growth.
Beyond general analytics, Planable highlights your top-performing posts based on impressions and engagement, making it easy to identify what content resonates most with your audience. You can also set custom date ranges to view trends over time, helping you adjust your content strategy based on real performance data.
For teams that rely on data to guide decisions, Planable’s Analytics View simplifies performance tracking, helping you optimize content based on insights rather than guesswork. Whether you’re looking to increase engagement, refine posting schedules, or identify high-performing content, this built-in feature makes data analysis more accessible and actionable.
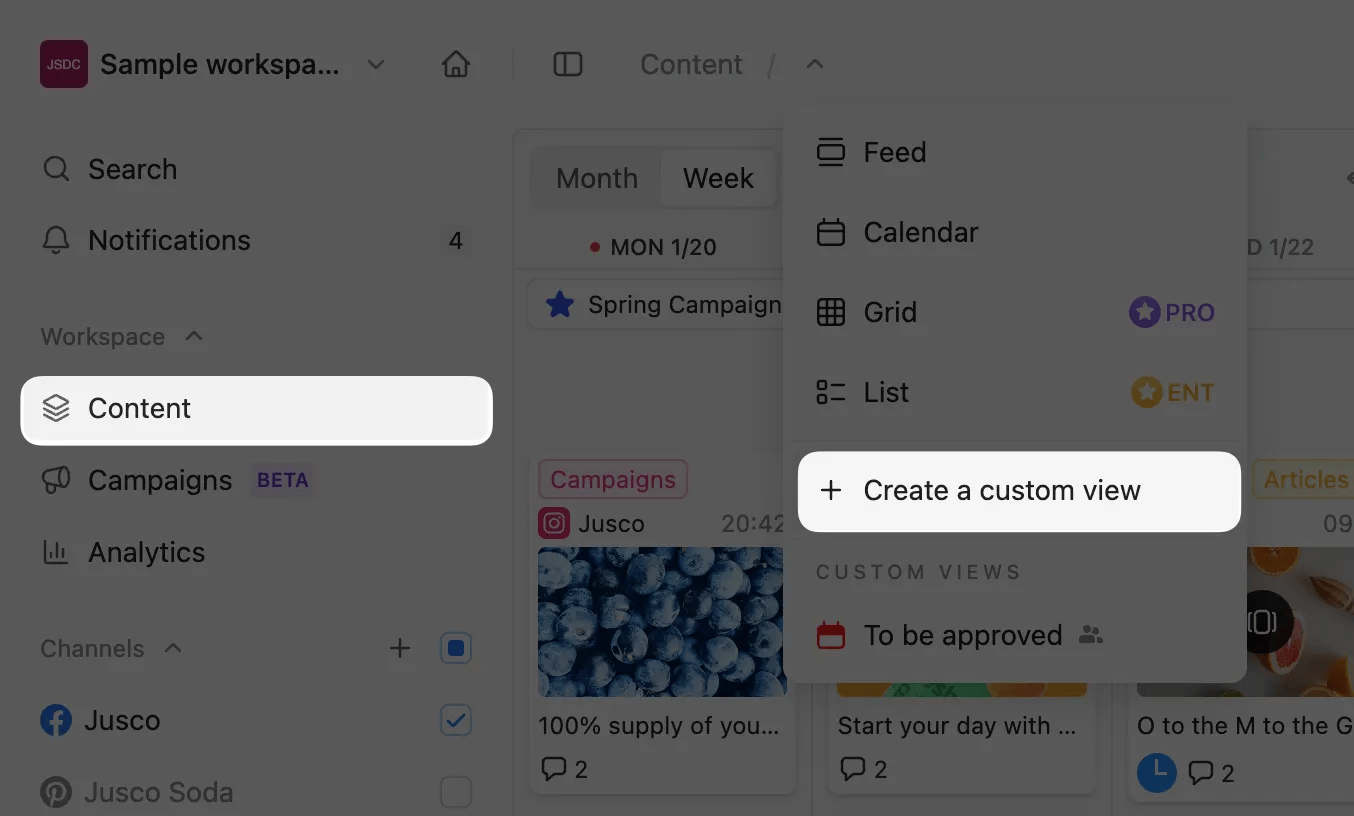
3.6. Custom View
Planable’s Custom View feature allows you to create personalized workspaces for specific content categories, making it easier to manage and review posts without constantly adjusting filters. Instead of sorting through every scheduled post, you can save custom filters for quick access to the content that matters most to you.
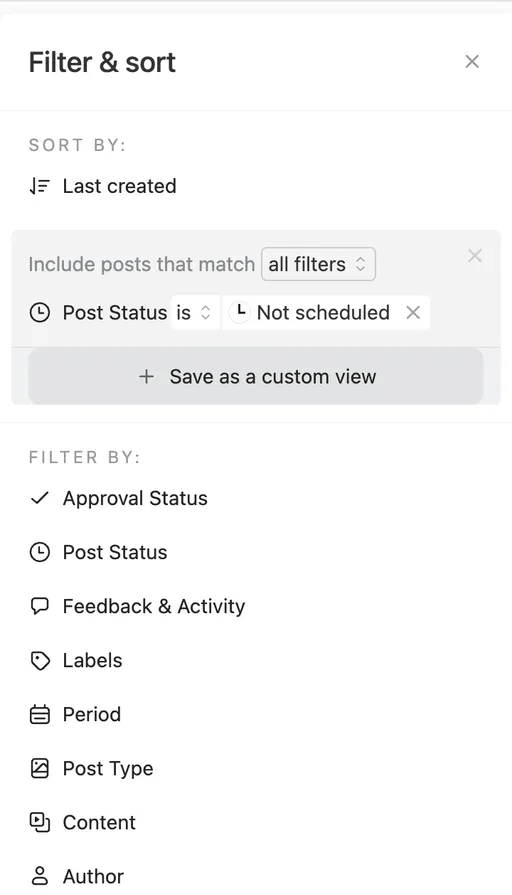
With Custom View, you can:
Set up dedicated views for approved, scheduled, or draft posts so you can quickly track content progress.
Filter content by platform, status, approval stage, or team member to focus on relevant posts.
Organize campaigns by themes, promotions, or content types to keep posts aligned with strategic goals.
Save multiple Custom Views for different workflows, ensuring efficiency for teams managing multiple brands or social accounts.
This feature helps social media teams avoid unnecessary back-and-forth when searching for specific content. Whether you’re tracking posts ready for approval, monitoring scheduled content, or reviewing past campaigns, Custom View makes it simple to switch between different content segments without losing focus.
4. Approvals and Collaboration in Planable
Effective collaboration is at the core of Planable, allowing teams to review, edit, and approve content seamlessly in one centralized platform. Instead of endless email threads or scattered feedback, Planable keeps everything organized in a way that streamlines workflows and enhances efficiency.
There are three key ways to provide feedback and collaborate on content in Planable:
4.1. Leaving Feedback in the Comments Section
Each post has a dedicated comment section where team members can leave feedback, ask questions, and tag specific users for input. This keeps discussions relevant and tied directly to the content being reviewed.
Use @mentions to notify team members and ensure feedback reaches the right person.
Attach supporting files, screenshots, or reference materials directly in the comment thread.
Track the full history of discussions, so past feedback is always accessible.
By keeping all communication within Planable, your team can stay aligned without the clutter of external messages or missed details.

4.2. Using Annotations for Precise Edits
For more detailed feedback, Planable allows users to highlight specific sections of text and leave targeted comments. This is especially useful for refining messaging, catching typos, or suggesting alternative wording.
Select the exact text you’d like to comment on, and an annotation box will appear.
Leave a comment with edits or suggestions, making it easier for content creators to apply the necessary changes.
Review all annotations in the comments section, ensuring a streamlined approval process.
This feature eliminates confusion by clearly indicating what needs to be changed and why, making it easier to move content from draft to approval quickly.
4.3. Suggesting Edits for Easy Revisions
If you want to propose an edit rather than just leaving feedback, Planable lets you suggest changes directly within the post.
Select the section of text you want to modify and choose "Suggest edits".
Type your suggested changes, which the original author can review and approve instantly.
Accepted edits are applied with one click, ensuring a smooth revision process without unnecessary delays.
This feature is especially useful when refining social media copy, ensuring content meets brand guidelines before being scheduled for publishing.
5. Notifications in Planable
Staying informed about content updates, approvals, and feedback is essential for keeping marketing workflows smooth and efficient. Planable’s notification system ensures that team members are always aware of important changes, reducing the risk of missed approvals or delayed content.
Planable offers multiple ways to receive notifications, so you can stay updated whether you're working in the app, checking email, or managing content on the go.
5.1. Notification Center: Your Content Hub
The Notification Center in Planable acts as a centralized hub for all updates related to content approvals, feedback, and publishing.
Access notifications by clicking the bell icon on your dashboard or within a workspace.
Or within your workspace, you can access your notifications.
Notifications are sorted into three main tabs:
Approvals – See posts awaiting approval and recent approval decisions.
Feedback – View comments, tagged mentions, and suggested edits on posts you’re involved in.
Updates – Track content status changes, such as posts moving from draft to scheduled.
This structured approach allows teams to quickly find what’s relevant without being overwhelmed by unnecessary alerts.
5.2. Customizing Your Notifications
Besides the notifications mini inbox, Planable provides the option for you to stay up-to-date, thanks to three options: desktop, mobile, and email.
Here's how you can access the Notification settings:
Click on the profile icon.
A dropdown menu will appear. Select the "Profile settings" option, where you can manage your notifications.

3. Click on "Notifications"

1. Desktop Notifications
Receive real-time updates while working in Planable. These pop-up alerts notify you about feedback, approvals, or publishing changes.
✅ Best for: Immediate awareness of content updates while working on your desktop.
📝 Tip: Be sure to enable browser notifications for Planable to receive these updates.


2. Mobile Notifications
Stay connected to content updates even when away from your desk. With the Planable mobile app, you can receive push notifications for approvals, feedback, and status changes.
✅ Best for: Keeping up with urgent tasks and approvals while managing content on the go.
📝 Tip: Manage mobile notification preferences in the app’s settings for a customized experience.
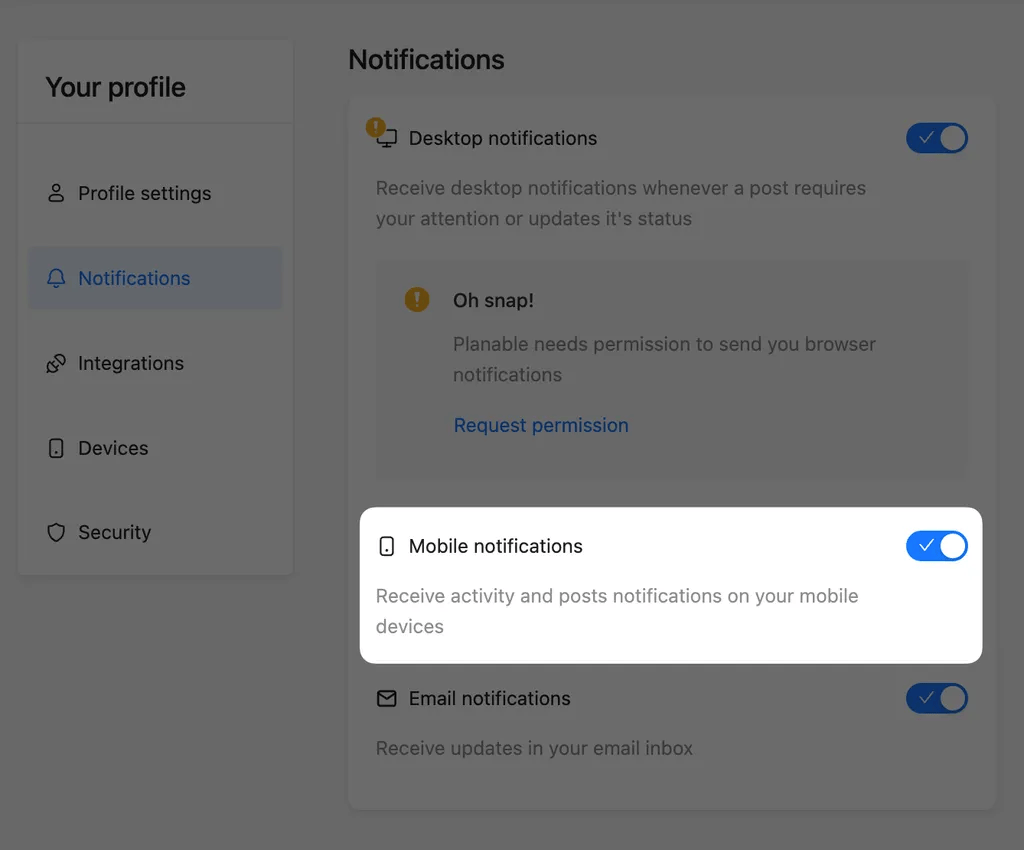
3. Email Notifications
Planable provides email notifications to ensure you stay informed about important updates, even when you're not actively using the platform. You can customize your email settings to receive notifications that match your workflow preferences.

Be mindful that if you've signed up with your email address in Planable, you'll be required to verify your email address (as indicated below). Email verification is important to secure your account and ensure you receive notifications properly.

Additionally, you can adjust your email notification settings to control when and how often you receive updates:
When to Send Notifications
When I'm idle or offline – Only receive emails when you're not using the app.
Always be notified – Get email updates regardless of your activity status.

Frequency of Notifications
Immediately – Receive an email as soon as an event happens.
Once an hour – Get consolidated updates in a single email every hour.

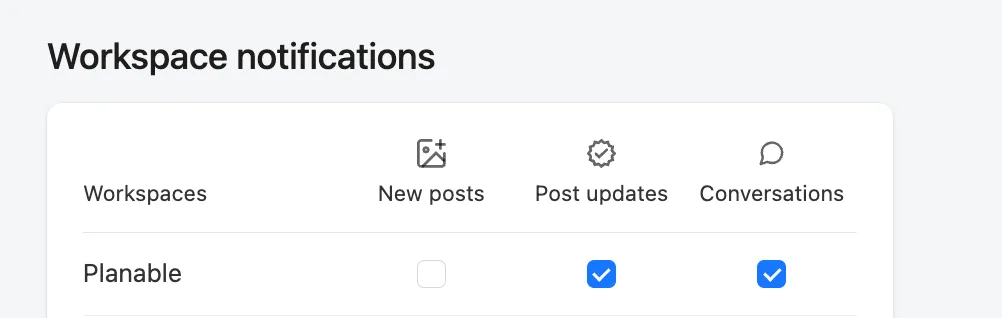
Types of Email Notifications
You can choose to receive email alerts for:
New posts in the workspace – Stay informed when new content is added.
Updates on post status – Know when posts are approved, scheduled, or published.
Conversations and discussions – Get notifications when you're tagged or when comments are added to your posts.
6. Approvals
6.1. How to Approve a Post
In Planable, the approval process is simple, efficient, and customizable to fit your team’s workflow. Once an approval workflow is set up, no post can be published or scheduled without being reviewed and approved by the designated approver. This ensures that all content aligns with your brand’s standards before going live.
To approve a post, simply click the "Approve" button once you're satisfied with the content. With this one-click action, you enable the post to be either published or scheduled according to your preferences.

If you ever approve a post by mistake, you can easily unapprove it. Just click the same button again to reverse the approval. This flexibility allows you to maintain control over your content while keeping the process straightforward and error-free.
7. Why Businesses Should Use Planable
Planable simplifies content management by streamlining collaboration, approvals, and scheduling in one centralized platform. Instead of juggling emails, spreadsheets, and multiple tools, teams can draft, review, and approve content in a single workspace. With real-time feedback and structured approval workflows, content moves from concept to publication without delays. Live post previews ensure brand consistency across platforms, while multiple viewing options—Feed, Calendar, Grid, and List—help teams stay organized. Built-in analytics provide performance insights, eliminating the need for external tracking tools. By keeping everything in one place, Planable makes content creation faster, more efficient, and stress-free for businesses.
Next Steps
Want to simplify your social media workflow? Sign up for Planable today or contact Magnolia Marketing for expert social media management services.